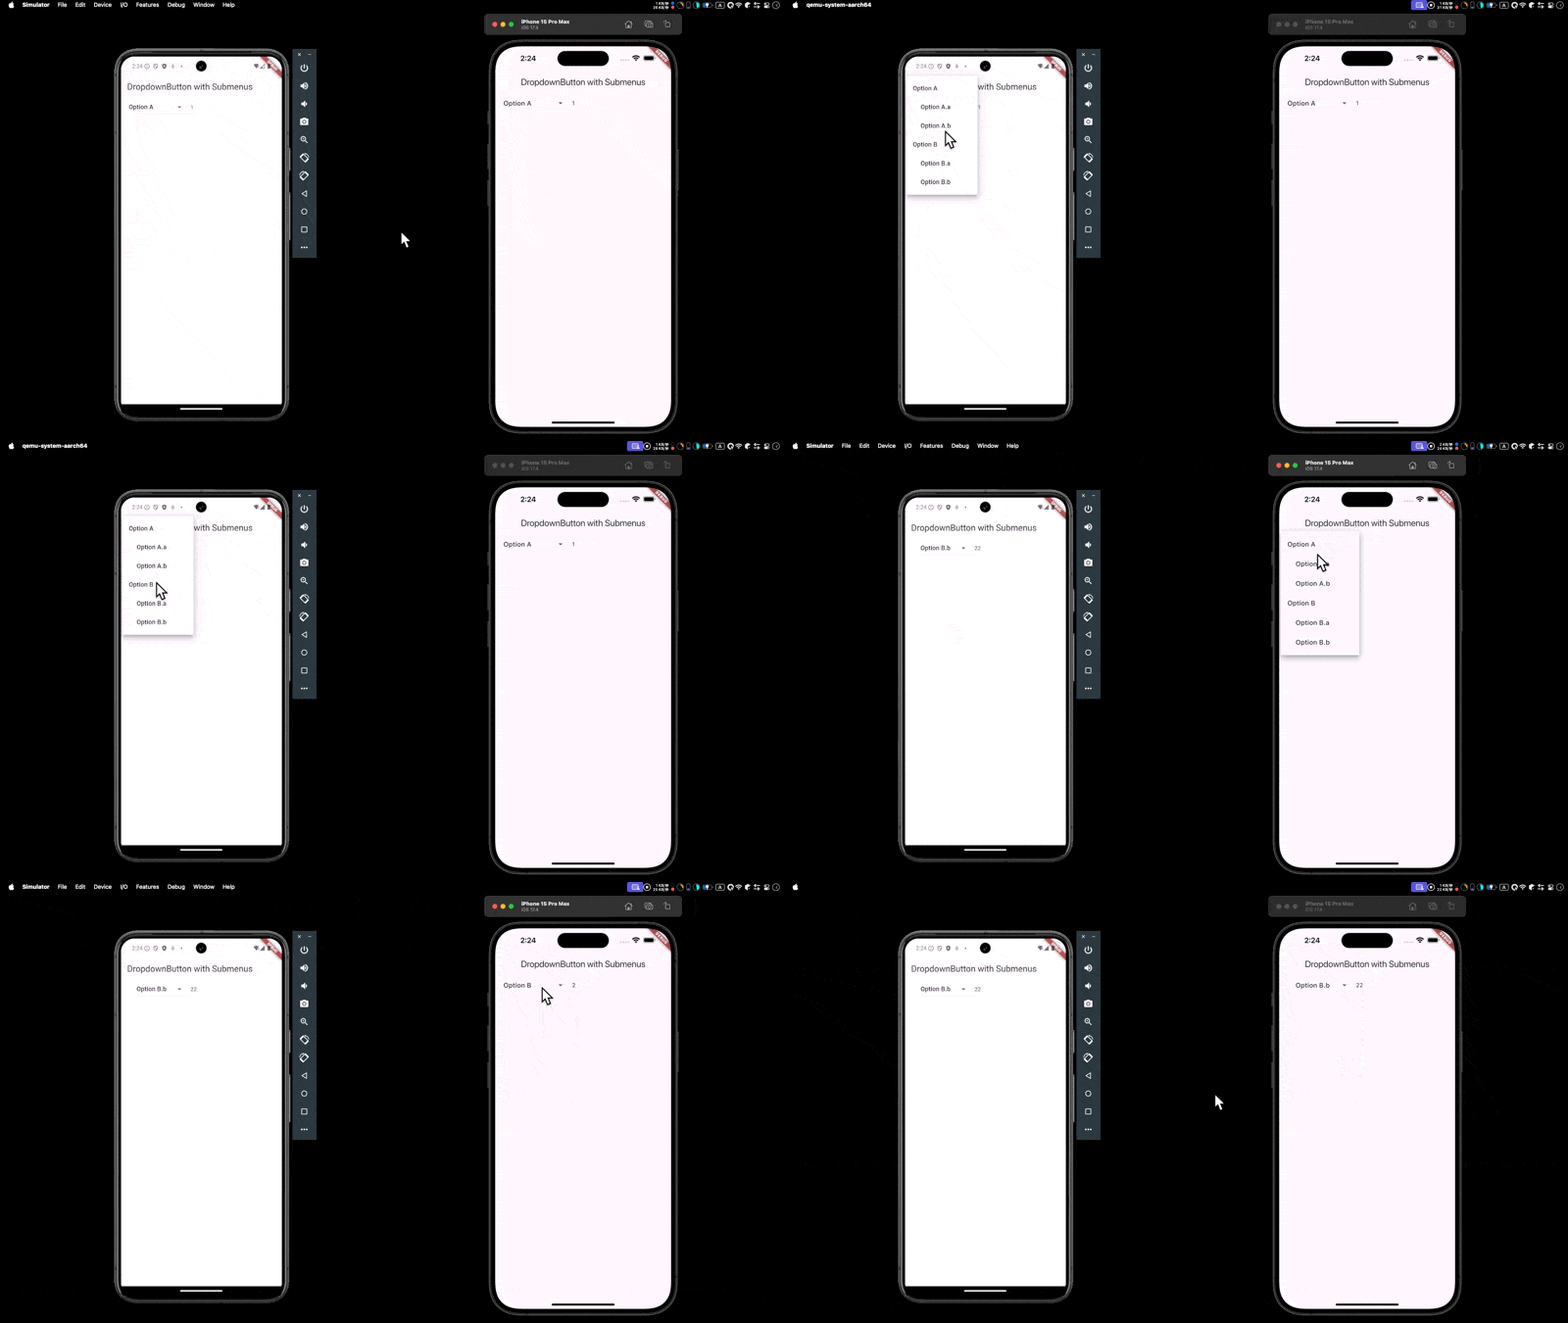
DropdownButton 可實現兩層下拉選單。
Version
Flutter 3.24
Flutter

- Android 與 iOS 都成功使用
DropdownButton實現兩層下拉選單
DropDownButton
import 'package:flutter/material.dart';
class Home extends StatefulWidget {
const Home({super.key});
State<Home> createState() => _Home();
}
class _Home extends State<Home> {
int? _selectedValue = 1;
Widget build(BuildContext context) {
var appBar = AppBar(
title: const Text('DropdownButton with Submenus'),
);
var dropdownMenuItems = <DropdownMenuItem<int>>[
const DropdownMenuItem<int>(
value: 1,
child: Text('Option A'),
),
const DropdownMenuItem<int>(
value: 11,
child: Padding(
padding: EdgeInsets.only(left: 20.0),
child: Text('Option A.a'),
),
),
const DropdownMenuItem<int>(
value: 12,
child: Padding(
padding: EdgeInsets.only(left: 20.0),
child: Text('Option A.b'),
),
),
const DropdownMenuItem<int>(
value: 2,
child: Text('Option B'),
),
const DropdownMenuItem<int>(
value: 21,
child: Padding(
padding: EdgeInsets.only(left: 20.0),
child: Text('Option B.a'),
),
),
const DropdownMenuItem<int>(
value: 22,
child: Padding(
padding: EdgeInsets.only(left: 20.0),
child: Text('Option B.b'),
),
),
];
var dropdownButton = DropdownButton<int>(
value: _selectedValue,
hint: const Text('Select an option'),
onChanged: (int? newValue) => setState(() => _selectedValue = newValue),
items: dropdownMenuItems,
);
var selectedValue = Padding(
padding: const EdgeInsets.only(left: 16.0),
child: Text('$_selectedValue'),
);
var body = Padding(
padding: const EdgeInsets.only(left: 20),
child: Row(
children: [
dropdownButton,
selectedValue,
],
),
);
return Scaffold(
appBar: appBar,
body: body,
);
}
}
Line 10
class _Home extends State<Home> {
}
DropdownButton必須搭配StatefulWidget
Line 11
int? _selectedValue = 1;
_selectedValue:定義 state 取得目前用戶所選擇的項目
Line 58
var dropdownButton = DropdownButton<int>(
  value: _selectedValue,
  hint: const Text('Select an option'),
  onChanged: (int? newValue) => setState(() => _selectedValue = newValue),
  items: dropdownMenuItems,
);
DropdownButton:建立下拉選單,必須使用泛形指定用戶所選擇項目的型別value:目前 DropdownButton 的值,會綁定到 stateonChanged():當用戶改變所選擇項目是觸發事件,將值寫入 stateitems:設定下拉選單項目
Line 21
var dropdownMenuItems = <DropdownMenuItem<int>>[
  const DropdownMenuItem<int>(
    value: 1,
    child: Text('Option A'),
  ),
  const DropdownMenuItem<int>(
    value: 11,
    child: Padding(
      padding: EdgeInsets.only(left: 20.0),
      child: Text('Option A.a'),
    ),
  ),
];
DropDownMenuItem:建立下拉選單項目
Line 20
const DropdownMenuItem<int>(
  value: 1,
  child: Text('Option A'),
),
DropDownMenuItem:建立下拉選單項目value:選單值child:選單文字
Line 24
const DropdownMenuItem<int>(
  value: 11,
  child: Padding(
    padding: EdgeInsets.only(left: 20.0),
    child: Text('Option 1.1'),
  ),
),
- 第二層下拉選單以
Padding實現
Line 65
var selectedValue = Padding(
  padding: const EdgeInsets.only(left: 16.0),
  child: Text('$_selectedValue'),
);
Text:顯示目前用戶所選擇項目的值
Conclusion
- 因為要使用 state 記住目前用戶所選擇的項目,所以必須搭配
StatefulWidget - 第二層下拉選單可使用
Padding實現